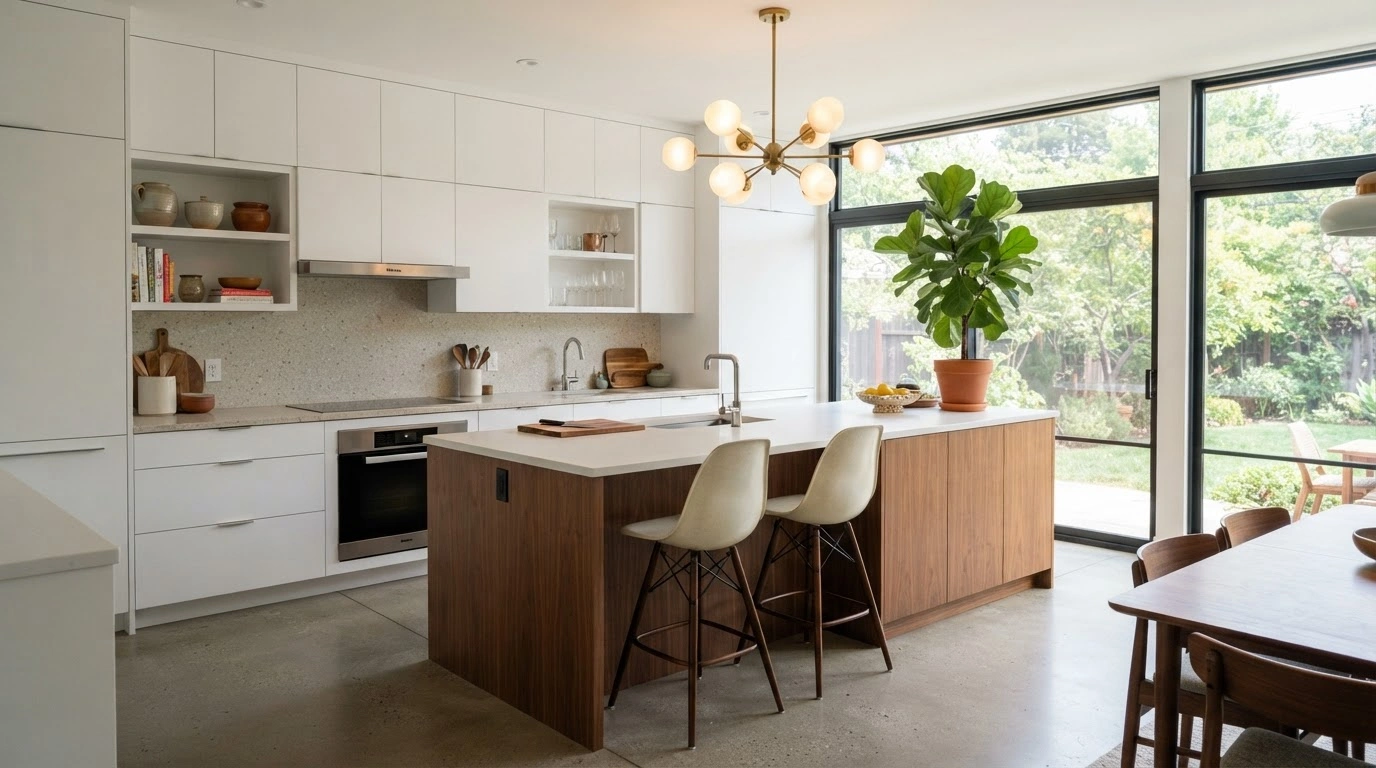
When you remodel a mid-century home, picking finishes is not the hardest part. Deciding what to protect is. The short answer we've landed on after many of these projects: keep what defines the architecture (clean horizontal lines, the fireplace wall, the connection to the yard) and modernize what you use every day (layout, storage, work surfaces).
A recent Dallas-area kitchen put that rule to the test. The homeowners loved their house's mid-century bones but were living with a closed-off kitchen, no pantry, no mudroom, and a front living room nobody used. Here are the five decisions that shaped the project, and why we made each one.
| Decision | What We Kept | What We Changed |
| Layout | Open sightlines to living areas | Added a large central island |
| Fireplace wall | Built-ins in their original spot | Refreshed cabinetry and trim |
| Finishes | Warm, simple material palette | Quartzite counters, brass hardware |
| Yard connection | Glass-forward rear wall | Larger sliding glass door |
| Floor plan | Overall footprint | Front room became mudroom and pantry |
1. Opening the Kitchen Without Erasing the Floor Plan
Mid-century homes were built around flow, but many kitchens from that era were tucked away as work rooms. The homeowners wanted the kitchen to feel like part of the living space, not a room off to the side.
We opened it up and anchored it with a large central island. The debate was how big to make that island. Too large, and it reads like a new-construction kitchen dropped into an older house. Too small, and it fails as a prep and gathering space. We sized it to keep clear walkways on all sides and kept its lines simple and low-profile, so it echoes the horizontal feel of the architecture instead of competing with it.
Takeaway: In a mid-century home, an island should look like it belongs to the house, not to a showroom. Keep the profile clean and the proportions modest relative to the room.
2. Updating the Fireplace Built-Ins Instead of Tearing Them Out
The built-ins around the fireplace were dated, and demolishing them would have been the easy call. We kept them in place and updated them instead.
That wall is one of the strongest pieces of original character in the house. Removing it would have flattened the room. Updating the cabinetry let us keep the architectural rhythm while making the storage usable.
This decision led to one of the most important details in the whole project: contrasting trim. We ran trim throughout the connected spaces in a color that coordinates with the new kitchen cabinetry. That single choice ties the kitchen, living area and fireplace wall together, so the remodel reads as one design instead of three separate projects.
Takeaway: Before you demo a built-in, ask whether it defines the room. Refacing or rebuilding in the same footprint often costs less than you'd expect and keeps the soul of the space.
3. Choosing Quartzite and Brass Over Trendier Finishes
Material choices are where many mid-century remodels lose their way. Ultra-glossy, ultra-modern finishes can make the house feel like it's trying too hard.
We chose quartzite countertops for their natural variation and durability, paired with brass hardware and designer lighting. Brass has deep roots in mid-century design, and it adds warmth against the cabinetry without feeling like a costume. The lighting was chosen as a design statement in its own right, which is very much in the spirit of the era.
One honest note on quartzite: it is a natural stone, so it needs sealing and some care. Homeowners who want zero maintenance should weigh that before committing.
Takeaway: Pick one or two period-appropriate details, like brass or sculptural lighting, and let the rest stay quiet. A little nostalgia goes a long way.
4. Going Bigger With the Sliding Glass Door
Mid-century architecture is famous for blurring the line between indoors and out. The existing opening to the backyard didn't live up to that idea.
We installed a large sliding glass door. It pulls in natural light, opens the kitchen to the yard, and restores one of the defining traits of the style. Opening an exterior wall involves structural work, so this is not a change to make casually, but in this home it paid off more than almost any finish upgrade could.
Takeaway: If your budget forces a choice, invest in light and indoor-outdoor connection before splurging on decorative finishes.
5. Giving Up a Front Living Room for a Mudroom and Hidden Pantry
When we first walked the home, there was no mudroom and no pantry. There was, however, a front living space the family rarely used.
We converted it into a new entry from the garage, a large functional mudroom, and a hidden pantry off the kitchen. This was the biggest debate of the project, because removing a formal room feels like a loss on paper. In practice, it solved the family's daily clutter problem and kept the open kitchen clean and calm.
Because the work extended into the foyer, mudroom and living areas, the project became closer to a full home renovation than a simple kitchen remodel. Planning it that way from the start made it easier to keep trim, cabinetry and finishes consistent across every space.
Takeaway: Square footage you don't use is the cheapest square footage to repurpose. Look for underused rooms before you consider an addition.
What We'd Tell Anyone Remodeling a Mid-Century Home
-
Walk the house and list the features that make it mid-century. Protect those first.
- Modernize function boldly: layout, storage and entry flow.
- Keep finishes warm and restrained, with one or two period nods.
- Use trim and cabinetry color to tie connected rooms together.
- Prioritize natural light and the connection to the yard.
The goal is a kitchen that works like a new one and still feels like it was always part of the house.